Taking Your eCommerce to the Next Level with WooCommerce
The global marketplace is shifting, and by 2023, nearly a quarter of all retail purchases will be made online. If you've already started selling online, you've made a smart move. But to truly thrive in this growing digital landscape, you need to keep refining and improving your online store.
Thinking about a new platform for your online store? If Shopify's starting to feel a bit limiting, a move to WooCommerce could be a game-changer. It's the perfect way to get more control over your site, from advanced marketing tools to a level of customization you just can't get with Shopify, helping you take your business to the next level.
Shopify or WooCommerce: A Comparison Shopify: A Brief Overview
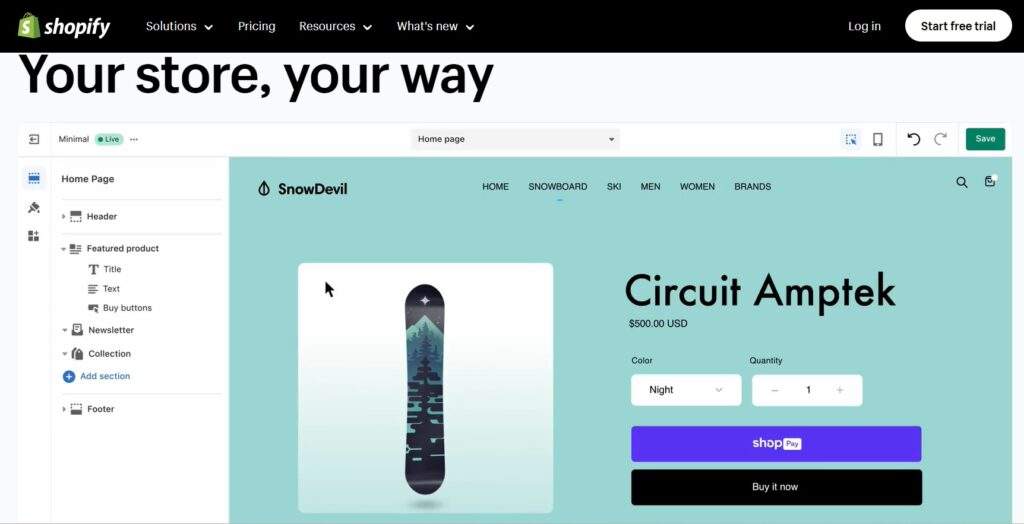
Shopify shines as the ideal platform for those new to online selling, offering an intuitive interface that allows quick store setup. However, as your business grows, you might find Shopify's features limiting. This experience sets the stage for a vital decision: transitioning to accommodate a broader clientele or diversify your product line might necessitate exploring alternatives, leading to the "Shopify vs WooCommerce" debate, a crucial comparison for your evolving business needs.
For many online businesses, the choice between WooCommerce and Shopify comes down to a simple trade-off: do you prefer ease of use or maximum flexibility?
Shopify is often the go-to for its straightforward, all-in-one platform. It's built for convenience, handling things like hosting, security, and updates for you. This makes it a great choice if you want to get your store up and running quickly without a lot of technical hassle.
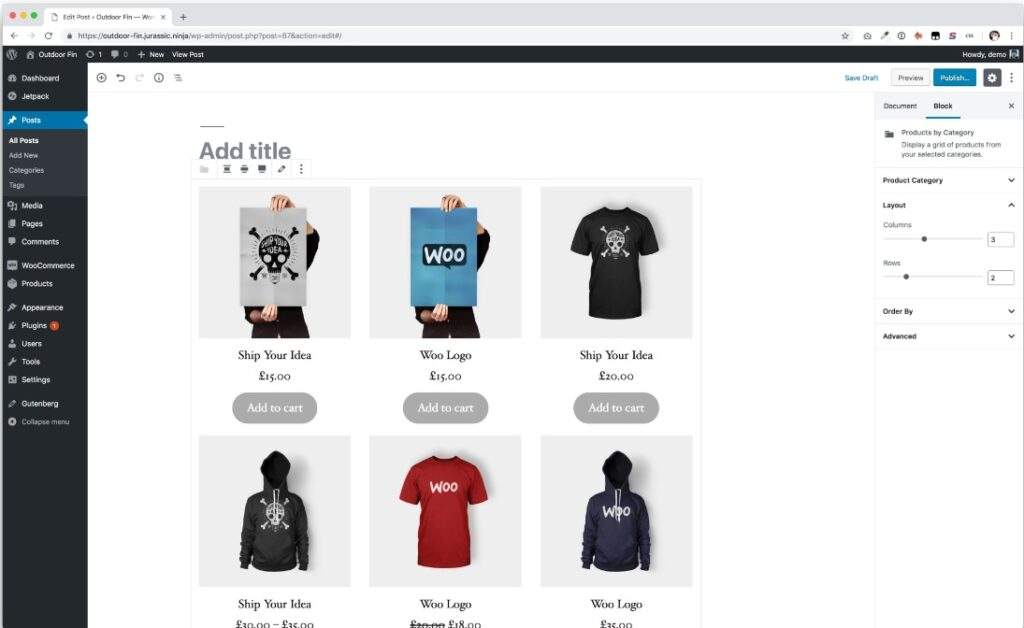
On the other hand, WooCommerce is an open-source plugin for WordPress that offers a much higher degree of customization. With thousands of available plugins and themes, you can shape your store exactly how you want it. This freedom, however, comes with a steeper learning curve. You're responsible for managing your own hosting, keeping your site secure, and handling updates.
Ultimately, there's no single "best" option. Your choice should depend on your specific needs and your comfort level with technology. If you're a business owner who wants a quick, simple solution, Shopify is probably the right fit. But if you have more technical skills and want complete control over your online store, the flexibility of WooCommerce is hard to beat.
The Case for WooCommerce
WooCommerce gives you complete control over your online store. You can customize every aspect of the design and functionality, creating a unique and seamless shopping experience that your customers will love.
Key Points to Ponder Before Making the Switch:
- Enhanced Flexibility: WooCommerce integrates seamlessly with WordPress, one of the most versatile web development and CMS tools. This means you can personalize almost every aspect of your store.
- Design Variety: While Shopify has a set range of design templates, the WordPress community offers myriad WooCommerce-compatible themes. For a truly unique storefront, you can even collaborate with a WordPress designer.
- Greater Control: WooCommerce grants you more authority over SEO, facilitating better search rankings. Furthermore, backing up your site, choosing payment gateways, or integrating third-party services becomes a breeze.
- Diverse Functionalities: With WooCommerce, you can harness extensions to link your store with other platforms, giving you a robust marketing edge. From offering digital gift cards to setting up an affiliate program, your options are vast.
Embarking on the Shopify to WooCommerce Transition
- Selecting a Hosting Provider: Your WooCommerce store's efficiency heavily depends on your hosting provider. Providers like Kinsta and WP Engine are some of the best, balancing affordability and performance.
- Transferring Content: Manual transfer is always an option, wherein you export your Shopify data and then import it to WooCommerce. Alternatively, tools like Cart2Cart can automate this process for you.
- Professional Assistance: While DIY methods are cost-effective, hiring a seasoned web designer can ensure a hassle-free, efficient migration. They can not only handle the technicalities but also give your store a refreshing, professional look.
The Migration Process
The magic happens here. Let’s break down the migration steps:
Export Data from Shopify
- Log into Shopify Admin.
- Navigate to the 'Products' section.
- Click 'Export' and save the CSV file.
1. Log into Shopify Admin.
Description: Before you can access or modify any data in your Shopify store, you must authenticate your identity. This ensures the security of your store's data.
- Steps:
- Open a Web Browser: Open your preferred web browser (e.g., Chrome, Firefox, Safari).
- Go to Shopify: Enter shopify.com in the browser's address bar.
- Click on ‘Log in’: Typically found at the top right corner of the Shopify homepage.
- Enter Credentials: Input your store’s URL, then on the following screen, provide the email address and password associated with your Shopify account.
- Access Admin Panel: Once authenticated, you will be redirected to your store's admin panel/dashboard.
2. Navigate to the 'Products' section.
Description: Shopify's dashboard is divided into various sections that help you manage different aspects of your store. To export product data, you need to first navigate to the Products section.
- Steps:
- Locate the Left Sidebar: Once you’re in the Shopify admin panel, look for a vertical menu on the left side of the screen.
- Find ‘Products’: In the sidebar menu, click on the option labeled ‘Products’. This section contains all the information related to items or services you sell on Shopify.
- Access Product List: After clicking on ‘Products’, you will be directed to a page listing all the products available in your store.
3. Click 'Export' and save the CSV file.
Description: Shopify allows merchants to export their product data into a CSV (Comma Separated Values) file. This file can be used for backup, analysis, or for transferring data between platforms.
- Steps:
- Find the ‘Export’ Option: On the products page, usually at the top or near the product list, there should be an ‘Export’ button or link. This option allows you to extract and save your product data.
- Choose Data to Export: Once you click on 'Export', a dialogue box will appear. Here, you can select whether you want to export all products, selected products, or products by certain criteria (e.g., type, vendor).
- Select Export Format: Choose ‘CSV for Excel, Numbers, or another spreadsheet program’. This format is widely accepted and can be opened in various software.
- Initiate Export: Click on the ‘Export products’ button in the dialogue box.
- Download the File: Once the data is ready, Shopify will either automatically download the CSV file to your computer or send a download link to your registered email, depending on the size of your data. Locate the downloaded file in your downloads folder or access it from the email link.
- Save and Backup: Move the CSV file to a desired location on your computer and consider backing it up on an external hard drive or cloud storage for added security.
When you're ready to export your product data from Shopify, here's a simple, step-by-step guide to help you through the process. Think of it like this: you're just making a copy of your inventory list to have on hand.
First, you'll want to log in to your Shopify admin page. From there, navigate to the "Products" section. You'll see a list of all your products, just like you would expect. Look for the "Export" button—it's usually in the upper right-hand corner.
Clicking that button will bring up a small window with a few choices. You can export all your products, or just the ones you've selected. You can also choose which fields you want to include in the export, like product title, description, price, and so on. It's a good idea to think about what you need the data for and only export what's necessary.
Once you've made your selections, go ahead and click "Export products." Shopify will then work its magic and email you a link to a file, usually in a CSV format. This file will contain all the product information you requested. Just click the link in the email to download it.
A quick but important tip: always handle this kind of data with care. It's your store's valuable information, after all. It's a great habit to save the exported file in a secure place, maybe on a cloud service or a well-protected hard drive. This way, you always have a backup, just in case.
Import Data to WooCommerce
- Access your WordPress dashboard.
- Go to 'Products' and then 'Import'.
- Upload the CSV file you exported from Shopify.
Import Data to WooCommerce
1. Access your WordPress dashboard.
Description: The WordPress dashboard is the control panel from where you manage all aspects of your WordPress website. WooCommerce, being a plugin for WordPress, is also managed from this dashboard.
- Steps:
- Open a Web Browser: Launch your preferred web browser (e.g., Chrome, Firefox, Safari).
- Navigate to Your WordPress Site: Enter your website's URL followed by /wp-admin. For example, if your website is example.com, you would type example.com/wp-admin.
- Enter Credentials: On the login page, provide the username and password associated with your WordPress account.
- Access Dashboard: Once authenticated, you will be taken to the main WordPress dashboard or admin panel.
2. Go to 'Products' and then 'Import'.
Description: WooCommerce has an in-built data import function that can be found under the 'Products' tab in the WordPress dashboard. This function allows you to bring in products from other platforms, including Shopify.
- Steps:
- Locate WooCommerce on the Dashboard: On the left sidebar of the WordPress dashboard, look for 'WooCommerce' or directly 'Products', depending on your setup.
- Navigate to Products: Hover over or click on 'Products' in the sidebar.
- Choose 'Import': Within the 'Products' submenu, you'll see an option labeled 'Import'. Click on it to initiate the import process.
3. Upload the CSV file you exported from Shopify.
Description: The final step involves feeding the WooCommerce importer the CSV file containing your Shopify product data.
- Steps:
- Locate 'Choose File': Once you're on the import page, there will be an option to choose a file for upload, typically labeled 'Choose File' or 'Browse'.
- Select CSV File: Click on the 'Choose File' button and a file picker dialog will open. Navigate to the location on your computer where the Shopify-exported CSV file is saved, select it, and then click 'Open' or 'Choose'.
- Follow Import Wizard: WooCommerce will now read the CSV file and guide you through a step-by-step process to map fields and finalize the import. Ensure that each field from the CSV matches the appropriate field in WooCommerce. For instance, map the "Product Title" in the CSV to the "Product Name" in WooCommerce.
- Initiate Import: Once you've matched all fields and made any necessary adjustments, click on the 'Run the importer' or similar button to begin importing your products.
- Completion: After the import process concludes, a confirmation message will be displayed. Review your products in the 'Products' section to ensure that all data was imported correctly.
Addressing SEO Concerns
Redirect your Shopify URLs to your new WooCommerce ones to maintain your SEO ranking.
1. Importance of URL Redirection
- Why It's Necessary: When URLs change – which they often do when moving between platforms – any external links pointing to your website can become broken. This not only harms the user experience but can also lead to a drop in search engine ranking. Redirects inform search engines that the old URL has moved to a new location.
2. Identifying Changed URLs
- Create a Spreadsheet: Before making any changes, start by documenting all of your Shopify URLs in one column of a spreadsheet. Next to them, in a second column, list their corresponding new WooCommerce URLs. This will serve as a master list to ensure no URLs are missed during the redirection process.
3. Setting Up 301 Redirects
- What's a 301 Redirect?: A 301 redirect is a permanent redirect, signaling to search engines that a page has moved permanently. This type of redirect is most suitable when migrating websites or changing domains/platforms.
- Using Plugins: If your WooCommerce store is on WordPress, several plugins can help streamline the redirect process. A popular choice is "Redirection". After installing the plugin:
- Navigate to the Redirection settings in your WordPress dashboard.
- Add a new redirection rule by inputting the old Shopify URL in the 'Source URL' field and the new WooCommerce URL in the 'Target URL' field.
- Ensure the redirect is set to '301 - Permanent'.
- Save the changes and repeat the process for all URLs.
4. Test Your Redirects
- Manual Testing: It's crucial to ensure that your redirects are working as intended. Click on the old Shopify URLs (or use tools like browser extensions) to confirm they redirect smoothly to the new WooCommerce URLs.
- Online Redirect Checker: There are several online tools available that allow you to check if a redirect is set up correctly. Input your old URL into one of these tools, and it will show you the path it takes, confirming if the 301 redirect is working as it should.
5. Inform Search Engines
- Google Search Console: After setting up your redirects, it's a good practice to inform search engines about the change.
- Log in to Google Search Console.
- Use the "URL Inspection" tool to input your new WooCommerce URLs and request indexing.
- Additionally, submit a new XML sitemap of your WooCommerce site to expedite the crawling and indexing process.
6. Monitor for 404 Errors
- Continually monitor your site for 404 errors using tools like Google Search Console. If users or search engines encounter broken links, it can negatively impact user experience and SEO. Address these promptly by setting up appropriate redirects or fixing the links.
7. Maintain Redirects for the Long-Term
- Search engines and users might access old URLs for a significant time post-migration. It's essential to keep the redirects in place for an extended period, ideally indefinitely, to ensure no traffic loss.
Post-Migration Checks
Once you’ve migrated, ensure everything is as it should be:
- Check product listings: Ensure images, descriptions, and prices are accurate.
- Test purchase processes: Make a test purchase to ensure the checkout process is smooth.
- Monitor site speed: Ensure your WooCommerce site loads quickly and efficiently.
FAQs
Will I lose my customer data during migration?
No, if done correctly, all customer data can be seamlessly migrated.
Can I migrate my theme from Shopify to WooCommerce?
While you can't directly migrate themes, many WooCommerce themes are designed to closely resemble popular Shopify themes.
How long does the migration process take?
The duration varies depending on the size of your store. A smaller store might take a few hours, while larger ones could require a day or two.
Final Thoughts
Considering a switch from Shopify to WooCommerce? It's a significant move that can unlock a new level of growth and flexibility for your online store. While Shopify is a great starting point, many businesses eventually find themselves needing more control and customization than the platform offers.
WooCommerce provides a powerful, open-source solution that gives you complete ownership of your site and a world of possibilities for personalization. Making this transition successfully requires careful planning and a deep understanding of both platforms.
If you're ready to make the leap, our team of experts is here to help. We'll guide you through every step of the process, making sure your store's functionality is seamlessly preserved and its potential is fully realized.
Why Choose Canadian Web Designs?
✅ In-depth understanding of both Shopify and WooCommerce platforms.
✅ A dedicated team with years of migration experience.
✅ Tailored solutions that not only work but make your store stand out.
????️ Don't just migrate. TRANSFORM your online store.
???? Get in touch with Canadian Web Designs today for a personalized quote and expert guidance. Elevate your e-commerce potential!
Frequently Asked Questions
1. Will I lose my SEO rankings when I migrate from Shopify to WooCommerce? No, you shouldn't lose your SEO rankings if the migration is handled correctly. This involves setting up 301 redirects for all your old URLs to the new ones, which is a key step in the process.
2. How long does a Shopify to WooCommerce migration take? The migration timeline depends on the size and complexity of your store. Smaller stores may take a few hours, while larger stores with extensive product data and customer information can take longer.
3. Will my Shopify store be offline during the migration? A well-executed migration is typically done on a separate server, allowing your Shopify store to remain fully operational during the transition. This ensures there is no downtime or interruption to your sales.
4. Can I migrate my customer's credit card information? No, for security reasons, you cannot transfer a customer's credit card information. However, other customer data like addresses and order history can be successfully migrated.
5. How do I choose between an automated migration tool and a manual process? Automated tools are generally faster, more cost-effective, and less complex, making them a good option for most businesses. Manual migration is more hands-on and is typically reserved for those who are very comfortable with web development or have specific, unique needs.
Canadian Government Resources for E-commerce
Here are some resources that can help Canadian small businesses with their digital and e-commerce growth:
- Canada Digital Adoption Program (CDAP): This program provides grants and loans to help businesses get online, improve their e-commerce presence, and digitize operations. (Learn more)
- Business Development Bank of Canada (BDC): The BDC offers a variety of resources, including loans and advisory services, specifically for businesses looking to enhance their e-commerce capabilities and overall digital strategy. (Learn more)
- Canada Small Business Financing Program (CSBFP): This program makes it easier for small businesses to get loans from financial institutions to finance a variety of needs, which can include technology upgrades and the development of an e-commerce platform. (Learn more)
Table of contents
- Taking Your eCommerce to the Next Level with WooCommerce
- Shopify or WooCommerce: A Comparison Shopify: A Brief Overview
- The Case for WooCommerce
- Embarking on the Shopify to WooCommerce Transition
- The Migration Process
- Export Data from Shopify
- Import Data to WooCommerce
- Post-Migration Checks
- FAQs
- Final Thoughts
- Why Choose Canadian Web Designs?


